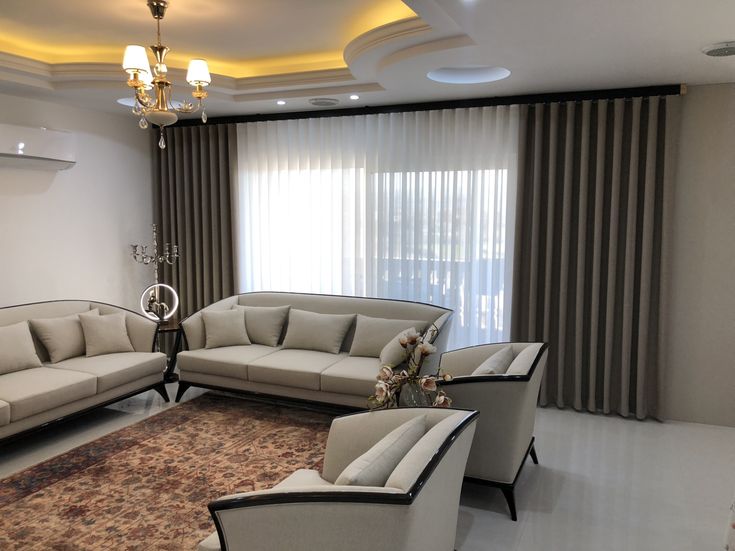
The ideal indoor setting is a matter of proper lighting control in addition to privacy, insulation and which is the reason why many people choose blackout blinds for a practical window covering. An expertly-finished installation will not depend solely on the tools but also on precise measurements, proper alignment of the bracket as well as understanding how the mechanism of rollers works. This guide provides detailed instructions on the steps to Install Blackout Blinds in Your Home with a simple organized method that is designed for those who need solid results with no getting lost in. This method combines the best methods of installation that are used in contemporary spaces throughout Abu Dhabi with practical DIY actions that increase the quality and longevity of your blinds. Beginning with the preparation of your window frame by selecting the right mounting brackets as well as the best direction for rollers as well as cutting the fabric of your blinds carefully, each step ensures seamless operation and total blocking of light. When you carefully follow the steps to achieve a neat appearance that improves security, enhances efficiency and provides the space an elegant design that resembles a professional installation.
Blackout Blinds Installation | A Step-By-Step Guide
The key to a successful installation is comprehending the workflow in general before attempting to use any equipment. Professional installers adhere to a process which ensures safety, alignment and durability of roller blinds . The process begins with taking measurements of the window’s opening and then making for the window recess, and identifying the chain’s direction, choosing the right roll direction, then securing the brackets with a firm grip and trimming them as needed, then fitting the blind in the window. The method is organized to avoid mistakes like unbalanced alignment, incorrect lighting coverage or tension issues with the chain.
This guide applies the same guidelines for installation used by skilled window treatment experts and professionals in home improvement. Every stage is designed to be precise making sure the blind is operating efficiently and gives full light control and room darkening as well as privacy. Being aware of these procedures prior to installation assists in avoiding common mistakes during installation and makes sure the blind rests at an appropriate level in the frame of your window. This results in a sleek and functional look that is a perfect match for modern design while increasing the insulation of rooms and bedrooms.
Essential Stuff For Blind Installation
Having the right equipment and supplies prior to starting will ensure that installation goes smoothly and accurately. Professional installers are always organized ahead of time since missing components frequently lead to improper fit or unsteady brackets. These essential tools can enhance safety, alignment as well as speed of construction.
- Measurement tape to ensure accurate measurement of width and height
- Drilling machine designed for concrete and the drywall surface
- Brackets for mounting as well as screws used by the manufacturer
- Plugs for walls to provide better grip on brick walls
- Spirit the level to ensure straight aligning of brackets
- Pencil to mark drill points exact
- Screwdriver to tighten the final bolt and adjustment
- Hacksaw or trimming tools to resize blinds when needed
The quality of tools you use directly impacts the performance. Wall plugs that are properly installed prevent brackets from loosening and using a spirit level will ensure that the blind is evenly distributed with no drifting on the other side. Making these necessary preparations before installation helps to keep the process in order and ensures a flawless result conforming to industry standards and used by professionals with Fivestar Curtains.
Step 1: Measure The Window Dimensions
An accurate measurement will be the cornerstone for a successful installation. The length and width of the window need to be carefully measured to ensure your blind is fully covered and a smooth motion. Professionals will measure multiple places since windows and walls do not always match perfectly. These gaps prevent sunlight to escape and also improves insulation.
In the case of inside mounts, measurements must reflect the widest width of the recess to ensure that the blind is fitted with no any friction. Outside mount fittings need more width, which will maximize lighting blockage as well as the privacy. Note down the dimensions before drilling will prevent the need for unnecessary adjustments later. A precise measurement also helps identify the spacing of brackets and the requirements for trimming blinds. This is directly affecting the appearance and function of the blind and is an essential aspects of DIY. A precise measurement enhances the efficiency of window blinds in Abu Dhabi and also ensures that the blind is seamlessly integrated into the design of the room.
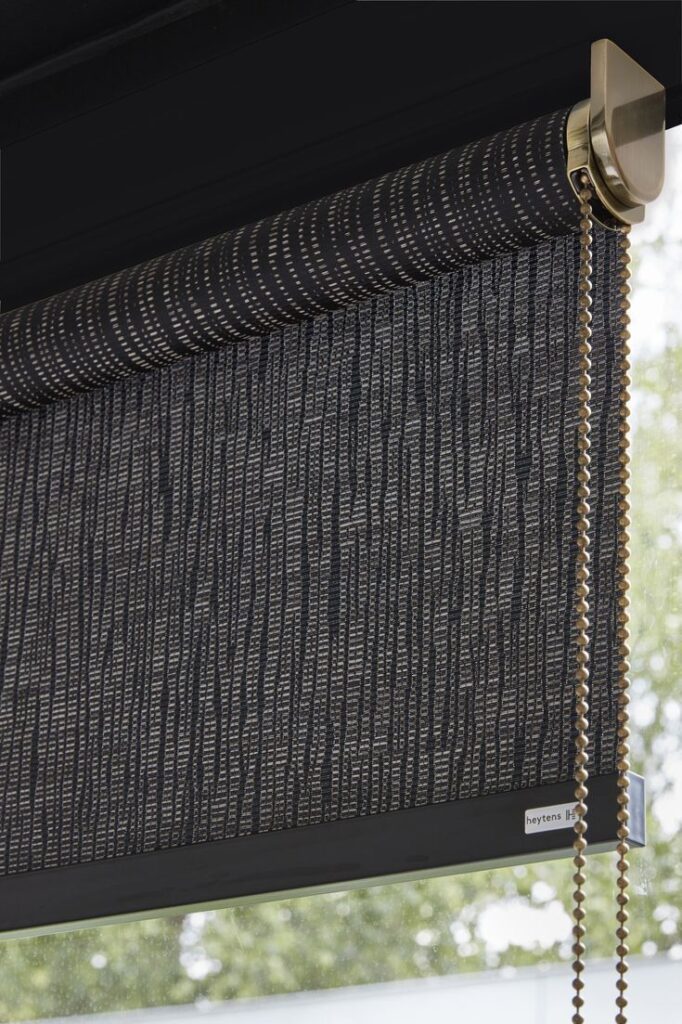
Step 2: Determine The Placement Of Roller Chain
The location of the roller chain affects access, safety, as well as the ease of use. The proper placement of the chain allows effortless lifting and lowering, as well as ensuring that the mechanism is at ease for everyday use. Installers usually place the chain in the direction that allows the most convenient access, without causing interference the wall feature or furniture.
The right choice of side helps to meet safety requirements, particularly when it comes to installing blinds in family or bedroom spaces. The device for tensioning the chain should be placed vertically so as to keep the smooth movement and minimize wear and tear on the roller mechanism. The correct positioning stops turning and guarantees consistent movement of the roller chain. If chain positioning is chosen carefully, the blind will feel like it is natural to operate, and also maintains its form for longer. This process improves usability and precision of installation, and adds in the durability over time of blackout roller shades ..
Step 3: Select The Roller Direction
The direction of the roller determines the way that blinds hang and the distance it is placed in relation to the window. Installers select between the both the front and back rolls according to window handles, frame’s depth as well as the amount of light they want to cover. The front roll permits the fabric to go through the frame’s front providing extra space to handle and enhancing the darkening of the room. Back rolls are nearer to the wall providing a sleek and minimalist appearance.
Choosing the right direction can help to eliminate any gaps that allow sunlight to enter and provides better insulation. The choice also affects the appearance specifically in modern spaces which favor clean lines. A proper roller alignment ensures that uniformity of the fabric minimizes friction and ensures smooth operating. This knowledge adds professional accuracy to DIY installations as well as enables you to get the exact appearance as professionally-installed window blinds.
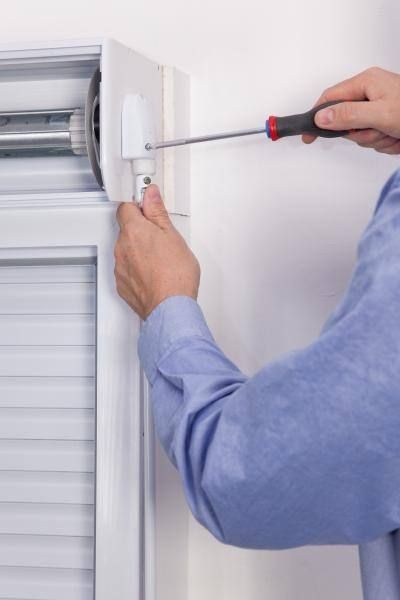
Step 4: Fix The Brackets
The installation of the brackets determines the stability of the system. Making sure to mark the drill points precisely by using a pencil as well as checking alignment with a spirit level ensures that both brackets are perfectly level. Inconsistent brackets can cause blinds to tilt and affect the performance and aesthetics.
After drilling holes then wall plugs need to be securely inserted to form sturdy anchoring points. By tightening the screws, you will ensure that the brackets will be able to support continuous movements without loosing. Correct bracket fixation prevents sound, vibration and tension problems with the chain. Always double-check the alignment prior to placing the blind since tiny mistakes made at this point can could cause functional issues later on. A secure bracket installation ensures reliable operation and prolongs the life of the mechanism. This action directly affects secure operation and a high-quality finish on every DIY roller blind installation task.
Step 5: Trim The Blind Portion
The blind must be cut as slight adjustments are necessary to ensure a perfect fitting. It is important to do this cautiously to ensure straight edges and avoid fabric fraying. The precise measurements will guarantee that the width of the blind is in line with the window’s opening, while also ensuring an even rolling motion.
Utilizing a cutting tool that is sharp or hacksaw will allow smooth cuts along the roll tube. Fabric should be secured when cutting in order to avoid unbalanced edges. A proper trimming process improves alignment with the brackets as well as improves overall design by guaranteeing an even coverage. Professional professionals handle this step carefully because a lack of precision in trimming impacts the control of light and can cause uneven rolling. If done correctly trimming can allow homeowners to attain a customized-level fitting that reflects the look of professionally-installed room darkening blinds.
Step 6: Install The Blackout Blind
After brackets have been installed and the blind fabricated for installation, the process is simple and enjoyable. Blinds must be placed with care in the brackets in accordance with the manufacturer’s instructions and ensure that the locking mechanism is secure to lock it in place. After installation, the blind will move smoothly and without resistance, which indicates the correct alignment of the bracket and its positioning.
Test the blind by lifting and lowering it numerous times proves that the blind is in balance. Adjustments to chain tensions and bracket clips can improve the performance. Correct installation guarantees total light blockage, and privacy improvement as well as improved temperature control within the space. It should be possible to see uniform fabric alignment over the window, and effortless operation, with little effort. The final stage of the process is completed and makes the window an elegant, fashionable design that increases quality of life and efficiency across your home.
FAQS
1. Do I have the ability to install blackout blinds by myself?
Blinds with blackouts can be put in place without the assistance of a professional with the use of basics tools, such as a drilling machine, tape measure as well as screws and the ability to measure. It is all about precise measurements and a proper alignment of the brackets. When the measurements are exact and the brackets have been fixed properly then the blind can be fitted easily and runs without problems. DIY installations work well in standard window sizes however, larger or motorized blinds might require assistance from a professional to achieve a beautiful appearance.
2. How can you build a dark-colored window?
For a DIY blackout window, begin by measuring the window’s width and height accurately. Pick an inside or an outside mount, based on the frame of your window. Install mounting brackets with security using screws and wall plugs. and then put the blind in place and check its motion. Make sure the blind covers completely the area of glass to stop light from leaking. A proper alignment will ensure an effective darkening of the room and privacy.
3. How do you install blinds on a window step-by-step?
The process of installing blinds step-by-step requires measuring the window as well as marking the position of brackets making holes for drilling, putting in the wall plugs or fixing brackets, then installing the blind with a secure fit. Following installation, check the roller mechanism to ensure the smooth operation. Use a spirit level to keep the alignment straight. This systematic method guarantees lighting control, and long-lasting performances.
4. How do you make an easy blind for windows through step-by-step?
For a basic window blind, you need to measure the width of your window, then cut the fabric slightly bigger than the frame to give complete covering. Connect the fabric to a dowel made of wood or roll tube, and then secure the fabric securely. Install simple brackets within or over the frame of your window before putting up the roll. A weighted bar on the bottom of the blind keeps it in place and straight during the use.
5. Which is the best method of blocking out the sun?
The most cost-effective way to block light is to use blackout fabric panels as well as thermal liners or the adhesive film for blackout. Curtains that block out light with linings also give you a cost-effective way to control light. To provide temporary solutions, heavy foam boards and layered fabrics are able to block the sunlight without requiring major installations.
6. What’s the ideal material to use for blinds with blackout?
The polyester fabric that has the triple-weave coating or foam-backed is commonly used to make blackout blinds since it blocks sunlight effectively and increases insulation. Blackout fabrics that are thermal enhance efficiency in energy by decreasing the transfer of heat. PVC coated fabrics are also efficient in achieving complete light blocking and water resistance, which makes the ideal choice for environments with high humidity.
7. What are the drawbacks to blinds with blackout curtains?
Blinds that block out light reduce the sunlight significantly. This can make rooms appear darker in the daylight if they are they are not properly adjusted. The thickness of the material can limit the flow of air around windows. Incorrect installation could cause small spaces that permit light to leak. Choose a good fabric, and ensure an accurate fit reduces the risk and increases the efficiency.
8. What can I do to convert normal curtains to blackout?
Regular curtains can be made into blackout ones by adding either a thermal or blackout lining backing. The lining is sewn directly onto the panel or attached with hooks for curtains. The blackout panels attached to the curtains can also help improve the control of light. This technique improves the privacy and insulation, without having to replace the window covering completely.
9. What’s the best choice of product for blocking out the sun’s glare?
Blackout fabrics made of polyester foam as well as multi-layer thermal material are among the best solutions to block the light. Vinyl and PVC also offer strong resistance to light. For total darkness, layering blackout fabrics paired with the right window frame covering will ensure maximal room darkening as well as improved energy efficiency.
Conclusion
Installing blackout blinds successfully combines precision, preparation, and an understanding of how each component works together. When measurements are accurate, brackets aligned correctly, and the roller mechanism positioned properly, the finished blind delivers excellent light control and privacy while enhancing the visual appeal of the room. This guide reflects professional installation standards used across residential interiors and gives homeowners the confidence to complete the task with clarity and control. A carefully installed blind reduces glare, improves insulation, and supports a more comfortable living environment throughout the year.
For homeowners wanting flawless results without stress, professional guidance can further improve finishing quality and long-term durability. If you want expert support, tailored recommendations, or premium window treatment solutions designed for homes in Abu Dhabi, connect with experienced specialists who understand local interiors and installation requirements. Contact Five Star Curtains today and transform your space with expertly fitted blackout blinds that combine style, comfort, and performance.